
17 Nov Paying Bills
Paying Bills
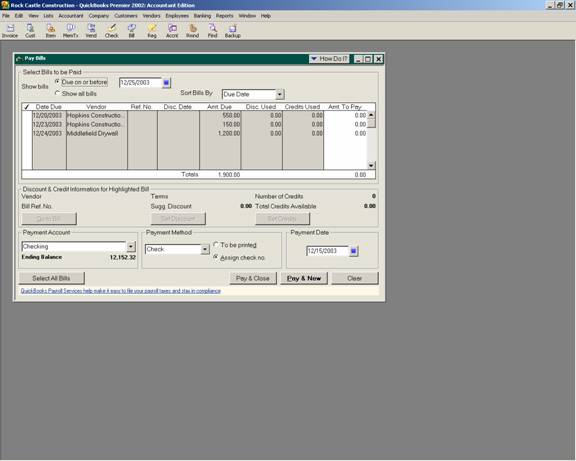
QBRA-2002: Vendors > Pay Bills

Pay amounts owed to vendors by clicking the line to the left of the bill to be paid. This places a checkmark in the column. To pay less than the full amount due, type the amount to be paid to the right of the bill. Notice that the ending bank balance changes accordingly, as bills to be paid are chosen. Printing checks is the next step.
TRICK: For versions 2001 and prior, even if checks are not printed through the system, always click to print to permit manual assignment of the proper check number in the check register. Otherwise, QuickBooks assigns the number it thinks is next. With 2002 and higher the option is available to assign the check numbers after the bills have been chosen to be paid.
TIP: Note that the software defaults to show bills on or before ten days from the current date. When bills are chosen to be paid, this date can be changed manually.
TIP: Based on how bills are chosen to be paid, they can be sorted by due date, discount date, vendor, or amount due.
TIP: Bills are shown on the pay bills screen based on their due date, not discount date. If discounts are to be taken, it is most efficient to choose show all so none are missed.
TRICK: New with version 2001 is the ability to automatically apply credits and take discounts. For businesses with many bills that have discounts, this is a big time saver. Keep in mind, however, that the credits will be applied to the oldest bills first. To use this feature, the preference must be turned on by choosing Edit > Preferences > Purchases & Vendors > Company Preferences