
21 Nov Invoice Duplicator
Invoice Duplicator
What It Will Do
Based on an invoice created in QuickBooks, or based on item information entered into the tool, all customers that are chosen will have an invoice created with their own customer:job list information.
The advantage over memorized transactions is that when amounts change (for example there is a price increase on contracted services, or the Home Owner’s Association approves a dues increase) there is no need to edit and re-memorize each transaction. Simply enter the new amount the next time and all invoices will reflect the change automatically.
System Requirements:
- Pro or higher of US 2003 or higher, Enterprise Solutions 3 or higher
- Microsoft Access 2000 or higher or Microsoft Access runtime engine (available for free from www.q2q.us)
How to Obtain the Tool
The tool is available for $119.00.
A trial version of the product is also available. It is a fully functioning version, but is limited to creating three invoices at a time. Get it here.
How to Use the Tool
Install the Tool
The tool is downloaded as an *.exe file which is then installed. Once the software has been installed, double click on the icon on the desktop to launch the program.
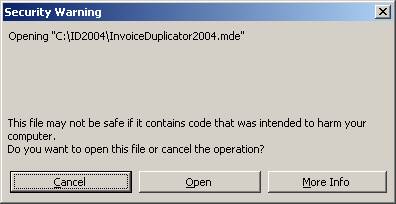
A warning will appear that can be acknowledged by clicking on Open

The owner’s name and Owner ID will need to be entered by clicking on Help > Registration > Enter appropriate information > Close Form

Set Up QuickBooks to Work with the Tool
Open the QuickBooks data file to be used when creating the invoices and click on Open from within the tool.

This process will launch an application certificate in QuickBooks which needs to be acknowledged. Depending on the version of QuickBooks, following screen may look a little different.

Using the Tool
Once the integration has been set up, using the tool simply requires going through the steps as they are on the menu screen:

Step 1: If the invoices will be duplicated from an invoice that already exists in QuickBooks enter that number here. This is a required field so if there is not an invoice to be used as the basis for the new invoices, enter an invoice number that does not exist in QuickBooks.
Step 2: Have the QuickBooks data file open, then click on the open button to link the tool to the data file.
Step3: If this is not the correct data file, click close, switch to QuickBooks and open the correct file, then come back to the tool and start again with step 2.
Step 4: Enter the criteria – this is helpful if the lists are long and only specific customers are needed for the invoice duplication process. If the entire list will be used, this step can be skipped.

Step 5: This copies the lists from QuickBooks into the tool.
Step 6: Part A: By clicking on the invoice data button, the detail for the invoice can be entered including the class and date as needed. The customer message and memo are optional. The item should be exactly the way it is in on the item list (which is why it is often easier to start with the invoice from QuickBooks and just make changes as needed). If the invoice will be created from scratch, edit the item from the item list in QuickBooks then cut and paste the item name/number into the item field here.
Step 6: Part B: The customers can be chosen several ways, however the most efficient is to choose a customer type, or custom field that designates those customers who should be invoiced by clicking on that field, then click on the select matching customer button and the tool will automatically place a check mark next to all the appropriate customers. Once the customers have been chosen, click on close form.
Step 7: By clicking on Import, the invoice as it was set up in Part A will be created for those customers chosen in Part B automatically into the QuickBooks file chosen in step 2.
Step 8: This report provides the information on the invoices that were created. (Note: Be sure to click on the printer to print or the word close to close. Using the x at the top of the report closes the entire tool).