
21 Nov Case Study – QuickBooks Enterprise Solution to QuickBooks for Mac
Through a wide range of events, a client’s data file was converted to QuickBooks Enterprise Solutions. They have now decided to bring the bookkeeping function back in house to be done on QuickBooks Pro for the Mac. Since there is not any feature within QuickBooks Enterprise to convert the data directly we had to think outside the box.
Within QuickBooks Pro and Premier for Windows there is functionality to convert the data back and forth with the Mac platform. However, there is not an easy way to do that with Enterprise Solutions, or even from Enterprise Solutions to Pro or Premier for Windows. To further complicate the situation, this specific client used QuickBooks Enhanced Payroll and had transactional data back to 1993, which they really wanted to keep if possible. So, we decided the process would be as follows:
Step 1 – Create a new file in QuickBooks Pro or Premier for Windows
Step 2 – Use the Data Transfer Utility to transfer those transactions that are permitted through the SDK and manually clear undeposited funds.
Step 3 – Use the Transaction and List Copier to transfer sales tax and payroll related transactions not accessible through the SDK. Note this is our approach since we will not need the functional details and reports in the new file. QuickBooks for Mac does not handle payroll in the same way as the Windows version so that data would not convert even if it was in the destination file.
Step 4 – Reconcile Account Balances, Accounts Receivable and Accounts Payable detail and do one bank reconciliation for the prior periods.

Step 5 – Back Up the data file (you probably want to do that often during the prior three steps too)
Step 6 – Create the file to be transferred to QuickBooks for the Mac

Now for the details on how to complete each step.
Step 1 – Create a new file in QuickBooks Pro or Premier for Windows. In addition, during this step we transferred the lists. The lists can be transferred as part of the next step, but we wanted to make sure we had a good clean starting point prior to dealing with the transactional data. The instructions may need to be modified slightly depending on the version of QuickBooks being used since the newer versions actually have an IIF choice on the import menu.
TRICK: Be sure any critical preferences are set the same as in the previous file, especially the sales tax preference to eliminate errors on import.
Step 2 – Use the Data Transfer Utility for the transactions supported by the SDK. The specific details of how we transferred all this data was as follows:
A. Set up access to the destination and source data files as explained in the DTU instructions above. TRICK: Don’t forget to allow access even when the file is not open.
B. Select transaction types for source transactions (the first time through I did bill, charge, check, credit card charge, credit card credit, credit memo, estimate, inventory adjustment, invoice, item receipt, journal entry, purchase order, sales order, sales receipt, time tracking, and vendor credit; the second time through I did billpymt check, receive payment, and transfer; the third time through I did deposits)
C. Set date range (since there was so much data to be transferred, I actually did a year at a time)
D. Open Source Company, export data, and review report, if desired.
E. Close Source Company
F. Open Destination Company, import data, and review report. In this case review of the report is CRITICAL. Be sure to note and/or correct any errors.
G. Close Destination Company
H. Repeat B-G until all transaction types for all date ranges have been imported.
I. Open the QuickBooks Destination Company and clear undeposited funds with uncleared transfers
Step 3 – Use the Transaction and List Copier for the transactions not supported by the SDK. This tool uses the IIF format which means that there is no error checking and the transactions cannot be linked using this tool. It does, however, provide a wonderful alternative for transactions such as paychecks and payroll liability checks since it will convert them into regular checks so they can be imported. The process is to open the Source QuickBooks file and open Excel (open it prior to exporting from QuickBooks). Create a journal report for the appropriate transaction type (in our case we chose payroll checks, liability checks, sales tax payments, YTD adjustments and liability adjustments) and add all columns to ensure that all the transactional detail you will need is available. For the newer versions of QuickBooks, don’t forget to click on expand for the report. Export the report to Excel, use the tool to create the iif (you will need access to the iif list file created in step 1 above). Import the iif into the destination company.
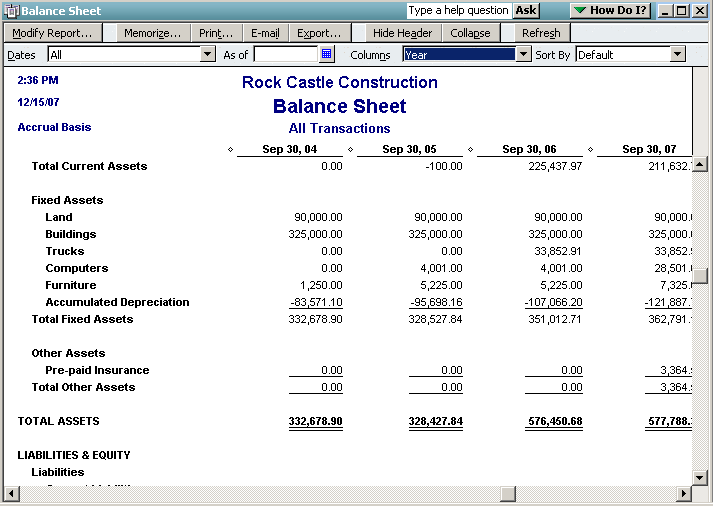
Step 4 – Reconcile Account Balances, Accounts Receivable and Accounts Payable detail and do one bank reconciliation for the prior periods. You may have been reviewing the data as you went along, if not, now is the time to make sure that all the balances match. The easiest way I have found to do this is to create a Balance Sheet in each company file with the date range set to all and the columns set as year.
Step 5 – Back Up the data file (you probably want to do that often during the prior three steps too)
Step 6 – Create the file to be transferred to QuickBooks for the Mac. For QuickBooks 2005 and Prior, the safest alternative is to send a *.qbw file back to the client. This process has become easier with version 2006 if the client has the newest version for Mac (which in our case they do). There is now a utility option to create a file for the Mac.
Practice Management Tips and Tricks
TIP: As part of the process, I created a PDF copy of the General Ledger, Check Detail, Deposit Detail, Customer Detail and Vendor Detail which I provided to the client on the same CD with the *.MAC.QBB copy of the data file. That way they will always have a complete copy of the data from the source file.
TIP: One of the questions that often come up from QuickBooks professionals is how to bid this type of work. I am a firm believer in under promise and over deliver so I would rather estimate high and come in lower. Each person needs to determine what it will take to do the job, but here is a general rule of thumb that worked for this project:
1-2 hours per year to transfer the data
1-2 hours per year to reconcile the two files
Based on the number of years to be converted, the lower end of the estimate was close to actual.
This assumes no unexpected issues and that the source data file is not extremely large (extensive job costing or detailed invoices for example will create a slower transfer rate as well as additional reconciliation challenges). If the payroll and/or sales tax transactions were entered into the new QuickBooks file rather than just transferred in as checks additional time would be required. That time could get extensive depending on the number of employees and level of detail to be preserved.